Monday, May 6, 2013

Simple Irish Brown Bread


This is the perfect wholesome, hearty side to any meal. A simple whole-wheat bread made with oats and buttermilk, it's quick to make and oh-so-good. We've even got a tip for you to make your own buttermilk equivalent from regular milk and lemon juice! What's not to love? ;)

Ingredients:

  • 4 1/2 cups whole wheat flour
  • 1 1/2 cups oatmeal (not quick cooking)
  • 1 teaspoon baking soda
  • 1 teaspoon salt
  • 2 Tablespoons honey or sugar
  • 2 1/2 cups buttermilk

Directions:

  1. Preheat oven to 400 degrees (F). Combine everything but buttermilk in a large bowl and stir the ingredients with your hands.  (If using honey, add to the buttermilk and mix just before adding to dry mixture.)
  2. Make a well in the dry mixture and pour in the buttermilk. Mix with your hands until the dough is just mixed. It will be wet and sticky.
  3. Shape the dough into a flat circle on your greased baking sheet (unless you are using a stone~no grease needed). 
  4. With a knife, score a deep X in the top of the circle, widening it with the blade as you cut. 
  5. Bake the bread until it is golden brown, about 50-60 minutes, depending on your oven.  *Quick tip~ make two circles and bake for about 35 minutes.*  Let cool a little before slicing.  But if you are like us, we just go for it as soon as comes out of the oven!! ;)  Makes a crusty, dense loaf or two.

Now, for the buttermilk cheat... ;)
I don't keep buttermilk on hand so I do this:
  ~ 1 cup buttermilk = 1 Tablespoon lemon juice (or vinegar!) and milk. To make 1 cup, let stand 5 minutes~
Easy-Peasy!


"Oh, when Irish eyes are smiling..." - yours will be too, once you take a bite of this fresh-baked, crusty bread spread with melting butter. Aye, 'tis a fair prospect noo, isn't it? ;)

Enjoy!

You will find us linked up at some of these fine sites.

Sunday, May 5, 2013

Simple Sunday Thoughts #5 - Rainy Days


Yesterday, it poured. It rained buckets all day long... and it seemed like the sunshine was never coming back, ever.
Why do we liken rain to something depressing and dreary? Well... sunshine is more pleasant. You can run around and play outside, have picnics, without fear of getting wet and chilled.
But if it never rained, what would happen? The earth would dry up, plants would shrivel, and next thing you know we'd be living in a dusty wasteland.

We need rain... and in the same way, we need those 'rainy days' of yore. You know... the ones you save up for. "I'm saving it for a rainy day" one might say. Rainy days happen.

Because that's when we grow. Rainy days bring new beginnings and fresh life. We wouldn't be grateful for the sunshine unless we knew what it was like to have stormy skies overhead.

But I have a blessed Comforter to quiet my soul on rainy days. He is with me, so that I have peace in my heart even when the storms rage, lightning crackles, and the thunder rolls.


Psalm 46:1-3…
God is our refuge and strength, a very present help in trouble.
Therefore will not we fear, though the earth be removed, and though the mountains be carried into the midst of the sea;
Though the waters thereof roar and be troubled, though the mountains shake.


When the outlook is bleak, all I have to do is look up. He will never, ever leave me, because He loves me. I am His beloved. The Lord is my strength - I don't have to be strong on my own.

You've probably heard or read this verse before.
Be still, and know that I am God. -Psalm 46:10. 

But have you ever stopped to think about it? How insanely busy have our lives become? Sometimes the only thing that makes us look up from our ever-present electronic screens is a frightening storm.

I would encourage you today to stop and rest... be still. Fill up your dry and thirsty spirit by spending some time with the One who loves you most.


Psa 147:7, 8  
Sing unto the LORD with thanksgiving; sing praise upon the harp unto our God: Who covereth the heaven with clouds, who prepareth rain for the earth, who maketh grass to grow upon the mountains


May you be blessed on this day of rest, and when the next rainy day comes along, place your trust in God, because he's right there waiting for you. :)

  You will find us linked up at some of these fine sites.

Saturday, May 4, 2013

Featured Resourceful Gal- Rachel Heffington


Hey readers! Julia here. We are delighted to share with you another of our featured resourceful gals, and this week the spotlight's on... Rachel Heffington! Everybody give Rachel a big hand of applause! ;) *roars of applause* Okay, okay, that's plenty. :D


J: Welcome, Rachel! Tell us a little about yourself so our readers can get acquainted with you.  

RH: I like to call myself the cock-eyed optimist. I'm practical, but there's just a terribly buoyant side to me that refuses to be entirely squelched, even in the hardest of times. I'm a novelist (as yet, unpublished) and a stay-at-home daughter. I work in our family business, help with the house and kids, and generally live a patch-work life that Jesus is faithfully knitting into something worthwhile in His eyes. My biggest desire is to be used by Him in some grand, adventurous way, small or large. For now, that way seems to be stretching pennies till you can see daylight through them. ;)

J:  I think your sense of humor is the thing I enjoy most about you, Rachel, and after having the privilege of reading some of your novels, I have no doubt that you WILL be a published author one day! :D So, what is your BIGGEST, #1 tip for resourceful living that you've discovered? Choose the best one, you can share some others in the next question. ;)

RH: Where there's a will there's a way. We like to complain that there's absolutely nothing to eat in the entire HOUSE or that we have absolutely NOTHING to wear, but I'm telling you that it can work if you take the dare to be creative.

J: I love it! :D Methinks I need to make that motto into a big sign and hang it where it smacks me in the eyes every day. :D Now... we want to hear some of your best tricks for feeding a large family on a budget. :D

RH: "Nothing goes better with cabbage than cabbage". ;) 

J: Trust Rachel to throw in a movie quote! Charlie and the Chocolate Factory, I believe! ;)

RH: No, really, this has been a skill I've gotten a lot of practice on this past year. Our family has never had much money, but the past two years have hit the business really hard. Plus, we've gained a vision to eat healthily, trying to avoid flours and most other starches and refined sugars. That sounds like an oxymoron, doesn't it? How on earth can you feed a family of 12 healthily with a skimpy budget? We aren't Irish--we can't survive off of potatoes thrice daily. ;)
  • First of all you grow a garden, which (if you can get past the price of seeds) greatly expands your repertoire of fresh groceries. 
  • Second of all, you polish your sense of humor and take everything in stride. 
  • Third of all, you become awesome at learning how to manipulate the herb cabinet. I am dead serious here. You can make a bland pot of rice or a pan of wilted potatoes snap to life with a skillful hand at seasoning. Conversely, there's nothing that will ruin even the best cut of beef more than a clumsy sprinkle of random herbs. Learn combinations and substitutions. The pot of chili I made this winter contained cocoa, coffee, and other atrocities, but tasted AMAZING.
  • Also, meat can be used as a garnish. We've gotten used to it. Totally. Who ever even heard of each member of the family having a whole chicken breast? HAH! Instead of grilled chicken, try grilled chicken salads, and you can spread it three times as far!

J:  Those are all fabulous tips! We also grow as many things as we can in our garden, and it helps out the grocery budget tre-men-dously, that's for sure. Tell us about how your family works together to get things done. Do you assign tasks to everybody, or do you all pitch in where needed?

RH: Originally my parents had made a chore chart with designated responsibilities for every kid. The bones of that have stuck (and changed) over the years, but since graduation I've been more of a catch-all, just helping where help is wanted. You know. :) 

J: That I do. ;) Okay, we all love DIY and home decor over here, and who doesn't love a party? Share with us some of the ways you turned your home into a coffee-house for one night to raise money for your missions trip to Romania! :D

RH: Pretty much once we had chosen the idea of a coffee-house, we took inventory of what we had and what we wanted to do, and ran to Pinterest. 

(Julia interrupts: *Squeal!* :D I love Pinterest!!) 

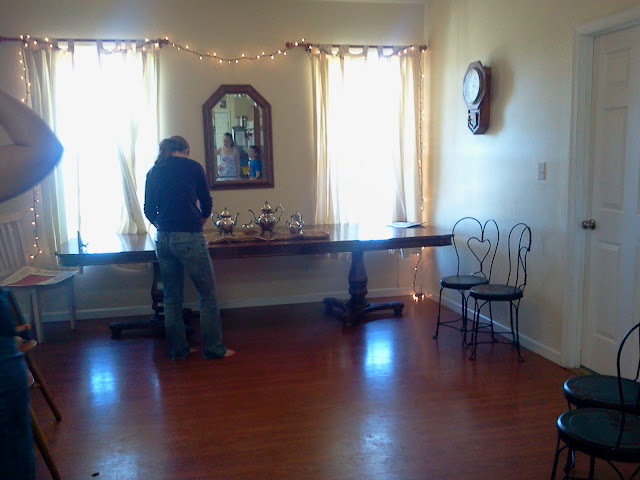
RH: Haha! My goal (because we didn't have any funds to use) was to do it without spending a red cent. We went with four categories for decor: European, Hipster, Vintage, and Coffee-Shop Classic. Literally, we spent nothing except a dollar to buy a package of putty for sticking our things up on the walls. We ransacked out attic, discovered cardboard looks amazing from far away, used newspaper for pinwheels, and lots of paint and glue for everything else. Other members of the team lent us some silver coffee-pots and things, and we did it up gorgeously, as the pictures will show.


J: GAH! Too cute. :) What adorable signs! And as I know, the Lord blessed that coffee-shop night and you raised more than you'd dreamed you would to finance your trip to Romania. God is so good! What are some of the dearest lessons that He has shown you through this adventure of living resourcefully? 

RH: Hands down, that He provides. Not on our time-scale, but on His. 

J: Wowwwww, I love that!

RH: And it's always just enough, somehow. We seriously could not live without Him because logically, we'd be in the gutter. But He's faithful and His provision is enough. :)
      He has also taught me how important it is to have a sense of humor. To see the empty cabinets as a chance to make a familiar recipe by substituting the ingredients you do have for everything it requests that you don't have. :D

J: I'm inspired! Thank you so, so much for being interviewed on Resourceful Gals, Rachel! It's been so much fun having you here! (Isn't she great, everyone?!?) :D 

RH: You are very welcome, Julia! I hope I said something worth saying, and that you all will enjoy this peep into my "resourceful" life. :D If you want to stop by, I have a blog where I write about my life, lessons, and adventures at www.lassofalltrades.blogspot.com.
       Thank you for having me, Jewels! And may the rest of you live wonderfully resourceful lives!

The only picture I have of Rachel and I... :D So blessed to know this gal!


  You will find us linked up at some of these fine sites.

Wednesday, May 1, 2013

DIY Cardigan Sweater Refashion


{Gloria here.} I just love cardigans.  I prefer them to pullovers because they're so much easier to put on and take off.  Also, we live in a lovely temperate climate... and sometimes you need a sweater, but then later it gets too warm and that thing just has to come off.  :)

So, this means I love re-fashioning sweaters into cardigans.  Let me show you how it's done! :)


You will need:
  • A pullover sweater
  • Fabric 
  • Interfacing 
  • Snaps
  • Matching thread


  • You will need two pieces of fabric for the binding.  Measure the length of the front of the sweater and add at least 3 inches. My measurement was 23 inches.  I chose to make the binding a finished 1 inch wide so I had to cut it 3 inches to start. You can make it narrower or wider depending on your taste and adjust measurements accordingly. :) My strip was 3" by 23".
  • Cut two strips of fabric and cut two pieces of interfacing the same size.
  • Iron the interfacing to the wrong side of the fabric.  Press over 1/2 inch on one long edge.


  • Find the center of the sweater by measuring across it.  I didn't show it in the picture but you might want to slide something stiff like cardstock or a wide ruler in the sweater so you don't pin the two layers together or cut the back of the sweater.
  • Pin the center line.  Cut it open.  This cable sweater made it easy because the cables gave me a nice line to follow.
  • Pin the unpressed long edge of the fabric to the sweater right sides together.  Leave some fabric hanging over the neckline and bottom of the sweater. This will be tucked in later. Sweaters are stretchy so be sure the two edges are the same length after you pin on the fabric strips.  
  • Using a 1/2 inch seam, stitch together with the sweater on the bottom as you go otherwise it will pucker.


  • Press sweater toward the fabric, (make sure the iron isn't too hot).
  • On the piece hanging over the end, turn under the fabric by the seam.   Press.
  • Turn over the fabric to line up nicely with the sweater and press.  (You may want to trim it a little before turning.)
  • Fold the fabric over the sweater so it is past the seam that you just stitched.  Press and pin.
  • Before you start sewing, hold the two threads and pull with a gentle steady pressure as you begin to sew. That will help the machine get started sewing smoothly and not get bogged down.
  • Stitch the fabric down using a narrow seam as shown in the picture.
  • Measure out where you want the snaps so they are evenly placed.  Stitch them on.


Voila!  You are done!!

It is important to use matching thread so that when you sew the sweater, the thread doesn't show.

You could always use buttons and make buttonholes instead of snaps.  Also, I have made several cardigans with zippers and hope to show you that tutorial some time in the future.

Feel free to contact us if you have any questions.  We are happy to help!

Happy sewing!

 You will find us linked up at some of these fine sites. And at Common Ground. 

Monday, April 29, 2013

Lemon Cream Pudding Soufflé

{Julia here} - and have I got a delicious recipe for you or what?!? Wow! I have never tried making a souffle' before, but this wasn't that difficult and the result was amazing! I am a huge fan of lemon meringue pie and this souffle' has the exact same delicious tangy lemon flavor as the lemon filing in that pie. Oh my. :D

The ingredients are really simple, it's what you DO to them that makes this special dish work. Go ahead and try this out - it may not look incredible, but it has two extra-delicious traits... the soft spongy top that melts in your mouth and the layer of creamy lemon sauce at the bottom. :D

Ingredients:


  • 4 lemons
  • zest of one lemon
  • 5 medium eggs
  • 8 tablespoons butter, softened
  • 3/4 cup sugar
  • 1/4 cup flour
  • 1/2 cup milk

Surprising Kitchen Tip- 
stick lemons into your oven for a couple of minutes at 350* before squeezing. You'll get more juice out of them!

Directions:


  • Preheat the oven to 350 degrees (F). Grease a 10-inch pie or souffle dish. 
  • Separate the eggs. Reserve yolks in a small bowl. Put the whites in a mixer on the highest setting and beat until they form stiff peaks. (This is so cool...Eggs are amazing!) - it took me about 15 minutes! I can't imagine beating them by hand!!
  • Use a wooden spoon or handheld electric mixer to cream butter and sugar together until creamy and light. (I scooped the egg whites into a different bowl and used the mixer bowl and mixer to cream the butter and sugar)
  • Add lemon zest and juice. It may look odd (with a funny texture) but keep beating.
  • Beat the egg yolks with a fork and then whisk them in bit by bit to your butter-sugar mixture.
  • Add the flour and beat together. Pour in the milk and mix.
  • Fold in the egg whites. (And when it says fold, that means carefully scoop the whites into the rest of the stuff and gently move your spoon around a little. DO NOT over-mix at this point!) :) 
  • Pour it all into the pie dish and set the dish IN a roasting pan.
  • Fill the roasting pan with water until it comes halfway up the outside of the pie dish. 
  • Bake for 40 to 45 minutes or till risen and golden brown on top. (I baked mine for 43 minutes, which was plenty!)
Eat hot, warm, or cold! And try not to eat most of it in one day like we did. ;) 


  You will find us linked up at some of these fine sites.

Sunday, April 28, 2013

Simple Sunday Thought #4


Love.

I was reminded the other day that without love I am nothing.
"Though I speak with the tongues of men and of angels, and have not charity, I am become as sounding brass, or a tinkling cymbal. 
And though I have the gift of prophecy, and understand all mysteries, and all knowledge; and though I have all faith, so that I could remove mountains, and have not charity, I am nothing. 
 And though I bestow all my goods to feed the poor, and though I give my body to be burned, and have not charity, it profiteth me nothing."  I Corinthians 13:1-3

That's pretty strong but it's true.

We may have a college degree, a successful career, beauty, fame, money, fancy clothes, shiny cars, a fabulously decorated house, beautiful children, but without love we are nothing.  In other words, those things really aren't important if we are living our lives without love or being loving to others.

But you may have nothing materially and have LOVE and then you are SOMETHING! 

Love.

It's important and only truly found in God.  He loves you and wants to have a relationship with you.

"For God so loved the world, that he gave his only begotten Son, that whosoever believeth in him should not perish, but have everlasting life."  John 3:16 


If you already have that relationship with Him, seek to be filled up with His love so you can pour out to those around you.

  "A new commandment I give unto you, That ye love one another; as I have loved you, that ye also love one another.  By this shall all men know that ye are my disciples, if ye have love one to another." John 13:34-35


Have a love-filled day,


You will find us linked up at some of these fine sites.

Saturday, April 27, 2013

Zenni Optical: A Review


(Gloria here!) Prescription glasses and I have a long history together.  I have worn glasses since the second grade, about 7 years old.  I am also very nearsighted so glasses are a big deal to me.

I shudder to think how much money I have spent on glasses over the years and lately the cost of new glasses has gone sky high. The optical places seem to have us over a barrel because you can only get glasses at certain places!

Enter Zenni Optical (down stage right, spotlight glowing)!!! Freedom from high prices and control firmly in the hands of the customer!

I recently purchased my first pair of glasses from Zenni.  Bottom line: I am THRILLED!!  Here's why:

  • The website is extremely user friendly and clearly explains all you need to know to find your fit for glasses.
  • The LOW COST! I need a strong prescription so I had to get the more expensive lenses and still my glasses only cost me $89.00 which included the $5.00 shipping. 
  • You can upload a picture of yourself so you can "try on" the glasses and see what looks good.  That is always the hard part..finding what looks good and the style that you like. 
  • It only took a couple of weeks to get the glasses so plan ahead when ordering. Don't expect to get them right away, like the big box stores.  But for me the savings of hundreds of dollars was well worth the wait. :)
  • The quality of the glasses is awesome.  They are not flimsy like some I have had. You have many options to choose from and can get alloy metal all the way up to titanium, not to mention the trendy plastic frames! :)
Just go to the optometrist (eye doctor) of your choice.  Get your new prescription and make sure they measure your PD and tell you the number. You will need this number. From Zenni, "The PD or Pupillary Distance is the distance between the pupils of the eyes, center to center, in millimeters. Most people have a PD between 54mm and 74mm.  If you received two values, such as 31/31.5, then the values are the distance from the center of your nose to each pupil center.  A  PD should be provided as part of your prescription."

Seriously, if you need prescription glasses, you should check out Zenni. I plan to buy more, just for a different look because I loved them so much.  

Also, they recently had a buy one, get one half off sale, so keep an eye out for their deals. (LOL.)

Here's to a clearer view on things!


You will find us linked up at some of these fine sites.

Friday, April 26, 2013

DIY Vanilla Extract


We do a lot of baking and cooking from scratch around here.  It is important to have a well-stocked spice cabinet.  One of the ingredients that I seemed to always be running out of was vanilla extract.  It comes in such little bottles! And is so expensive!!

Then when I started to watch my diet, I noticed that regular vanilla extract contained corn syrup! WHAT?? Corn syrup?!?  Yep, so unless you are buying organic you are probably getting ingredients you don't really want.

For example, from the Amazon site:

Watkins Original Vanilla Double Strength Extract
Water, glucose, propylene glycol, vanilla extract (alcohol, water, extractive of vanilla beans), alcohol (8.25%), artificial flavors, caramel color. Contains Sulfites.
$17.25 for 11 oz.

Simply Organic Pure Vanilla Extract Certified Organic, 4-Ounce Glass Bottles (Pack of 2)

$27.23 Water,organic Alcohol,organic Vanilla Bean Extractives


Flavorganics, Organic Vanilla Extract, 8 fl oz. for $21.41
Water, organic alcohol (35%), organic vanilla bean extractives.

McCormick doesn't even list the ingredients on their website or on Amazon.  The Food Renegade lists the ingredients as:
  • Vanilla bean extractives in water,
  • alcohol (35%),
  • and corn syrup.
Did you notice that water is the first ingredient on some of the lists?  You don't need water in vanilla extract! 

But never fear, The Resourceful Gals are here!!  Make your own natural vanilla extract and know exactly what's in it!  :)

All you need are real whole vanilla beans and vodka.  Place the vanilla beans in a container (that you can seal) and cover with the vodka.  We use the vodka because it has no other taste.  Let steep for a few days to a week before the first use.  Then use as you like and refill the container with the vodka as needed.  You will have wonderful vanilla extract and as much as you want right at your fingertips!  

Not to mention CHEAPER!!  This large bottle of vodka cost about $8 for 59 oz. which comes out to 13.5  cents per ounce and will last a good long time.  

You can get your vanilla beans at Herbalcom.com for only $18 for 26-28 beans.  I use 5 beans, cut in half and they will last for several years. That is only 69 cents per vanilla bean and using 5 costs $3.46. Use the rest of the beans for a back-up (they will keep) or make gifts to share with those you love!

So your 10 ounce bottle of vanilla extract initially costs $4.81 and will only cost you to add the vodka at 13.5 cents per ounce after that for about 2 years.  *Does happy dance*

So go ahead and get started on your own vanilla extract.  You'll be glad you did!!


You will find us linked up at some of these fine sites.

Thursday, April 25, 2013

The Secret to Great Hummus


Hey there! If you've ever wanted to know how to make really great hummus, we've got the tip for you. Any hummus recipe will work better when you use a BLENDER to whip it together, instead of a food processor. We used to use a food processor when making our favorite hummus recipe but recently tried using the blender... and were stunned at the difference! The hummus was creamy and smooth instead of grainy and chunky.

Our hummus recipe was adapted from the one in Sam Stern's Cooking Up A Storm, a fun cookbook geared more for teens, with delicious and easy gourmet recipes.

Hummus

{Serves 4}

Ingredients:
  • 1 (15 oz.) can of chickpeas
  • 2 garlic cloves or 1 tsp. minced garlic
  • Juice of one lemon (around 3 Tbsp) TIP- turns out awesome if you use a fresh lemon!
  • 1 Tbsp tahini
  • Salt to taste
  • 2 Tbsp olive oil
  • 2 Tbsp water
  • Dash of cilantro
  • Black Olives 8-10
BTW- "Tahini" is just ground sunflower seeds, and has a consistency similar to natural peanut butter. You can find it in the health foods section in most grocery stores!

Directions:

1. Drain the chickpeas and rinse thoroughly.
2. Heat the oil and 2 tablespoons water in a small saucepan, but don't boil.
3. Add all the ingredients to the blender, heated oil and water last. 
4. Blend until smooth. (You might need to stop once or twice to stir the mixture with a wooden spoon and aid the blending)
5. Serve with your favorite tortilla chips or pita bread and try not to eat it all at once. :D


We hope you enjoy this fresh and delicious Mediterranean dish!

  You will find us linked up at some of these fine sites.

Tuesday, April 23, 2013

The Health Benefits of Cooking with an Iron Skillet


Julia here! Do you cook with an iron skillet? Iron skillets are one of the most wonderful tools you can use in your kitchen! And here are a few reasons why...

Health Benefit #1- Use Less Cooking Oil!

That lovely sheen on cast-iron cookware is the sign of a well-seasoned pan, which renders it virtually nonstick. The good news about this is that you won’t need to use oodles of high-calorie oil to cook your tasty foods like potatoes, veggies, chicken, and more. :D We usually use a dab of butter on our antique frying pan, instead of cooking oil. I've heard it's not best to mix butter and cooking oil when seasoning one skillet, and we use butter because we usually cook scrambled eggs in our antique pan. :)

BTW, To clean cast iron, never use soap. This will strip the pan of its natural seasoning.Simply scrub or scrape your skillet with a washcloth or a brush and hot water and dry it completely. (We actually scrape ours off with a small square of plastic that came with our pizza stone.) :D

One way to season your cast-iron skillet is to cover the bottom of the pan with a thick layer of kosher salt and a half inch of cooking oil, then heat until the oil starts to smoke. Carefully pour the salt and oil into a bowl, then use a ball of paper towels to rub the inside of the pan until it is smooth. If you're using butter, heat a small amount of butter in the pan until it's good and sizzled, then wipe clean with paper towels. (why paper towels? So you can discard them after use.) If you have purchased a new iron skillet, it may take a few times before it's seasoned enough to use. 

Health Benefit #2- Avoid Harmful Chemicals.

Hang onto your hats, this is the scary part! The repellent coating that keeps food from sticking to nonstick pots and pans contains PFCs (perfluorocarbons), a chemical that’s linked to liver damage, cancer, developmental problems and, according to one 2011 study in the Journal of Clinical Endocrinology & Metabolism, early menopause. (YUCK. And we're using this regularly?) PFCs get released—and inhaled—from nonstick pans in the form of fumes when pans are heated on high heat. Likewise, we can ingest them when the surface of the pan gets scratched. Both regular and ceramic-coated cast-iron pans are great alternatives to nonstick pans for this reason.
We actually have a few nonstick frying pans still, but we're looking into replacing them for this very reason, and keeping an eye out at estate sales and yard sales for any unwanted iron skillets. :D

Health Benefit #3- Solve Iron Deficiency!

Did you know nearly 10% of American women are iron-deficient? (Neither did I, until I looked it up) Gloria (my dear mom and co-blogger) has struggled with iron deficiency, and I think cooking with our skillet has helped a lot. Her last blood-work report showed normal iron levels, even without her taking any iron supplements!

You see, while cast iron doesn’t leach chemicals, it can leach some iron into your food...and that’s a good thing. :) Cooking food, especially something acidic like tomato sauce in a cast-iron skillet can increase iron content by as much as 20 times!

Now, this isn't a health tip, it's a frugal one - using an iron skillet means you can decrease your pan replacement costs by 100%! THEY LAST FOREVER. :D 

So, what are you waiting for?! Dig out that iron skillet (or beg, borrow or snatch one from your Aunt Bea) and cook something great and guilt-free for yourself today. :D 


You will find us linked up at some of these fine sites.
More info about skillets here. :)